Title : Olympus OM-D E-M1 Mark II Review Extension
link : Olympus OM-D E-M1 Mark II Review Extension
Olympus OM-D E-M1 Mark II Review Extension
IMPORTANT NOTES:1. I am an Olympus Malaysia employee.
2. This is a user experience based review, based on my personal opinion which can be subjective.
3. All images were shot in RAW and converted directly to JPEG (High Quality) via Olympus Viewer 3
4. General camera settings, Noise Filter = OFF, Contrast/Saturation/sharpness = 0, White Balance = Auto (with an option maintain warm color = OFF), Gradation = Normal
5. Minimal post-processing applied to the images, with slight brightness/contrast balance tweak. All images were almost as good as straight out of camera, with minimal cropping for better presentation.
This is a continuation from the original Olympus OM-D E-M1 Mark II Review, if you have not read that first review entry kindly do so before proceeding to this extension. I have covered the important points of the E-M1 Mark II Review (Continuous-AF performance, 5-Axis Image Stabilization improvements, image quality, camera handling, etc) in that original review entry.
As you probably know, I have a day job, and can only do my shooting for this review in the weekend. Last Saturday was also the day we had our first official E-M1 Mark II touch and try event in Malaysia. Immediately after the event I went out to shoot some photographs, and I spent almost all my following Sunday to test out some of the features to compose this blog entry.
For this particular blog, I will be addressing the following questions:
1) What are the improvements in the 50MP High Res Shot in E-M1 Mark II?
2) How does E-M1 Mark II handle rolling shutter/jello effect in high speed shooting using electronic shutter?
3) More detailed explanation on how E-M1 Mark II's Continuous AF works, with more image samples
4) What are the improvements in camera operations? (Auto IS with exposure compensation, minimum shutter speed limit in Program and Aperture Priority mode, etc)
5) More images samples!
Lets get right into the first question on the 50MP High Res Shot, shall we?

50MP High Res Shot
7-14mm PRO, f/5.6, 1/1000, 7mm, ISO200

Left: 50MP High Res Shot, Right: 20MP
E-M1 MARK II HIGH RESOLUTION SHOT
The native image sensor used in the E-M1 Mark II has 20MP effective pixels. However, due to the image sensor being in a floating state, stabilized by the 5-Axis IS mechanism, the magnets that moved the image sensor was reprogrammed to move the sensor by half a pixel pitch, allowing a total of 8 photographs to be taken at slightly displaced position (half a pixel distance apart) and then all photographs were merged into a single high resolution shot, resulting in a true 50MP image.
Considering that the image sensor needs to be physically moved around in order for this method to work, there are some limitations to be taken note of.
1) Use of tripod is mandatory. Or at least resting the camera on a sturdy surface. Even slight movement of the camera or external vibration is sufficient to destroy the final outcome.
2) Not only there must be no movement on camera, the subject you are shooting should not have any movement as well, or the photographs will not be aligned perfectly. However, in E-M1 Mark II, there is improvement in mitigating random pattern movements (water/waves, leaves, etc) and we shall discuss this next.
3) Camera settings limitations: shutter speed not longer than 8 sec, aperture not narrower than F8, ISO not higher than 1600 and flash sync not faster than 1/50sec (previously in E-M5 Mark II or PEN-F, flash sync limit was 1/20sec)
4) When 50MP High Res Mode is activated, the camera uses full electronic shutter
5) Since the sensor captures 8 separate images, flickering light source will cause inconsistently merged results.
6) It takes about 1 second to take all 8 separate photographs, and an additional 2.5 seconds to merge them all in camera. All operation can be done in-camera, with just one push of a shutter button and require no further fiddling of settings. I strongly recommend use of 2 seconds delay to ensure no vibration from pressing the shutter button happened
7) You have the option to shoot 50MP High Res Shot in RAW or JPEG. In RAW, you get two files, a 80MP RAW file (effectively 20MP x 8 frames x 0.5 pixel) and a 20MP ORI file (first frame from the 8 photographs taken to merge). In JPEG, you get a 50MP file, because the amount of details and sharpness does not exceed a true 50MP image file using this pixel-shifting method. No, you cannot keep all the 8 original frames before merging, you can only keep the original first frame when shooting in RAW.
Improvements In The 50MP High Res Shot in E-M1 Mark II
Olympus claimed that the new Truepic 8 processing engine can recognize the subject movement area in the image and correct it by superimposing the same area with a 20MP original image. The downside is that the "corrected movement area" will have reduced resolution since it was taken from a single shot, but this should not pose an issue especially in typical situations with subject motion, such as moving water or leaves. I was curious on how effective this new methodology is and did some quick tests.

50MP High Res Shot
7-14mm PRO, F5.6, 1/800sec, 8mm, ISO200
Lets take a closer look at the water movement part in the frame.

The E-M1 Mark II successfully identified the water movement and substituted the affected area with a lower resolution image. The result was not too bad, considering that there are no defined sharpness and details in that particular zone.

The choppy area of water appeared less smooth than usual at this 100% view, due to the lower resolution sample being used. Still not a big problem here, and to me, this looks totally acceptable.

Unfortunately, for subjects with defined features, shapes and lines, this trick can no longer work and you get really strange, funky repetitive patterns showing where the subjects moved within the 1 second time frame.
The 50MP High Res Shot can successfully recover the subject movement area with by substituting details from the lower resolution image capture from one of the 8 frames before merging, and all this processing was done within 3-4 seconds, which was an impressive feat. This works for random pattern areas, or areas with no properly defined features, such as water and leaves, which are typical in landscape photography. I strongly believe this new improvement opens up a new possibility to shoot images outdoor, since the majority of landscape shots will either contain moving leaves/grass/trees or water.
However, if your moving parts in the frame have very definitive lines, shapes and patterns, the movement will not be fully fixed, and will still show as repetitive overlaying of subjects on one another. Moving people and vehicles are the best examples of this issue and should be avoided. This can be further illustrated by the following two samples, showing a person moving down from an escalator. Pay closer attention to the moving escalator.

50MP High Res Shot
7-14mm PRO, f/5.6, 1/80s, 7mm, ISO200
The moving escalator has become smooth, just like a slider!

20MP
7-14mm PRO, f/5.6, 1/80s, 7mm, ISO200
An actual shot taken, showing the original "shape" of the steps on the escalator.
The main message here is, if you want to make full use of the 50MP High Res Shot, you need to understand what it can and cannot do, and work within the limitations. If you can avoid the situation where the subject movement works against you, and you have a sturdy tripod to work with, you can get some remarkable shots showing immense amount of resolution, equating or surpassing most of the competition in the market (come on, we are not going to compare against medium format are we?). Surely, for product photographers, and now with the improved corrections in processing, even the outdoor landscape photographers, this 50MP High Res Shot can give you spectacular amount of quality details to work with.
Just another photograph to show the difference between a 50MP High Res Shot and a 20MP ordinary shot on the E-M1 Mark II.

50MP High Res Shot
25mm F1.8, f/2.8, 1/50s, ISO200

Left: 50MP High Res Shot, Right: 20MP
Possibility of Hand-Held High Res Shot?
The general reasoning and assumptions were: 1) 5-Axis IS should be able to stabilize the image sensor to allow hand-held High Res Shot 2) Now we have Image Stabilization in lens, while the image sensor is being moved, the lens IS can counter the camera shake due to hand-holding and 3) the electronic curtain speed has been improved, it is not much faster and this can make the High Res Shot hand-holdable.
Unfortunately, none of the above claims are practical in any sense!
It does not take a rocket scientist to figure out why. As I have mentioned earlier, in order for the High Res Shot to work, the image sensor needs to be physically moved, and this was done by using the 5-Axis IS magnets, moving the sensor by half a pixel each time. Since the 5-Axis IS was used to move the sensor, there is completely no stabilization happening while the High Res Mode was being activated. Then there comes the claim of the lens built in IS. The lens IS compensates for yaw and pitch movements (please Google if you need further clarification on what yaw and pitch movements are), while the image sensor is being moved in vertical and horizontal translations (up down left and right motions) for High Res Shot. On another note, for any stabilization to work, the counter movements are large (can be in centimeters!) which would work against the need to maintain the half pixel distance between each of the 8 shots taken to be merged into the High Res Shot! Now we have established that it is not possible for image stabilization to work together with the pixel shifting, and at the same time we need to maintain just half a pixel, not more, but exactly half a pixel distance movement between shots. How is that hand-holdable even if you have faster electronic curtain speed? No matter how fast the shutter speed or curtain speed is, you still need to physically move the sensor around 8 times, with variance of movement more than half a pixel throwing the image alignment completely off.
I am not saying that it is completely impossible to have High Res Shot done in hand-held. Maybe, by some technical miracle it can happen in the future. I sure would like that too, but to expect it to happen so soon (remember it was only introduced in E-M5 Mark II last year) is a little stretch too far.
ROLLING SHUTTER EFFECT IN ELECTRONIC SHUTTER
One of the popular questions I have observed from forum discussions was regarding the electronic shutter used, especially when shooting in high speed burst sequential mode of either 60 frames per second (single-AF) or 18 frames per second (continuous AF). Many also have noted that the sample photographs I have shown in my original E-M1 Mark II review did not show any trace of jello effect (rolling shutter effect), which was a common issue for electronic shutters in most digital cameras shooting high speed action subjects.
1/60 SECOND ELECTRONIC CURTAIN SPEED
The E-M1 Mark II has an increased electronic curtain speed of 1/60sec, in comparison to 1/13sec found in E-M1, or E-M5 Mark II. The faster electronic curtain speed enabled the capture of the image (pixels on the image sensor blacking out line by line, simulating the effect of opening and closing of actual shutter mechanisms) with minimal distortion due to the curtain speed not catching up to the movement speed. This effect can often be observed in fast panning shots, or subjects moving extremely fast. I have not encountered this in the E-M1 Mark II yet, but that does not mean E-M1 Mark II is completely immune to jello/rolling shutter effect. I think in extra-ordinary situations where the 1/60sec curtain speed was not sufficient, the distortion can still appear, but this should only occur in rare circumstances.
Consequently, this also benefits the video recording in E-M1 Mark II, showing lesser possibility of jello effect occurrence.
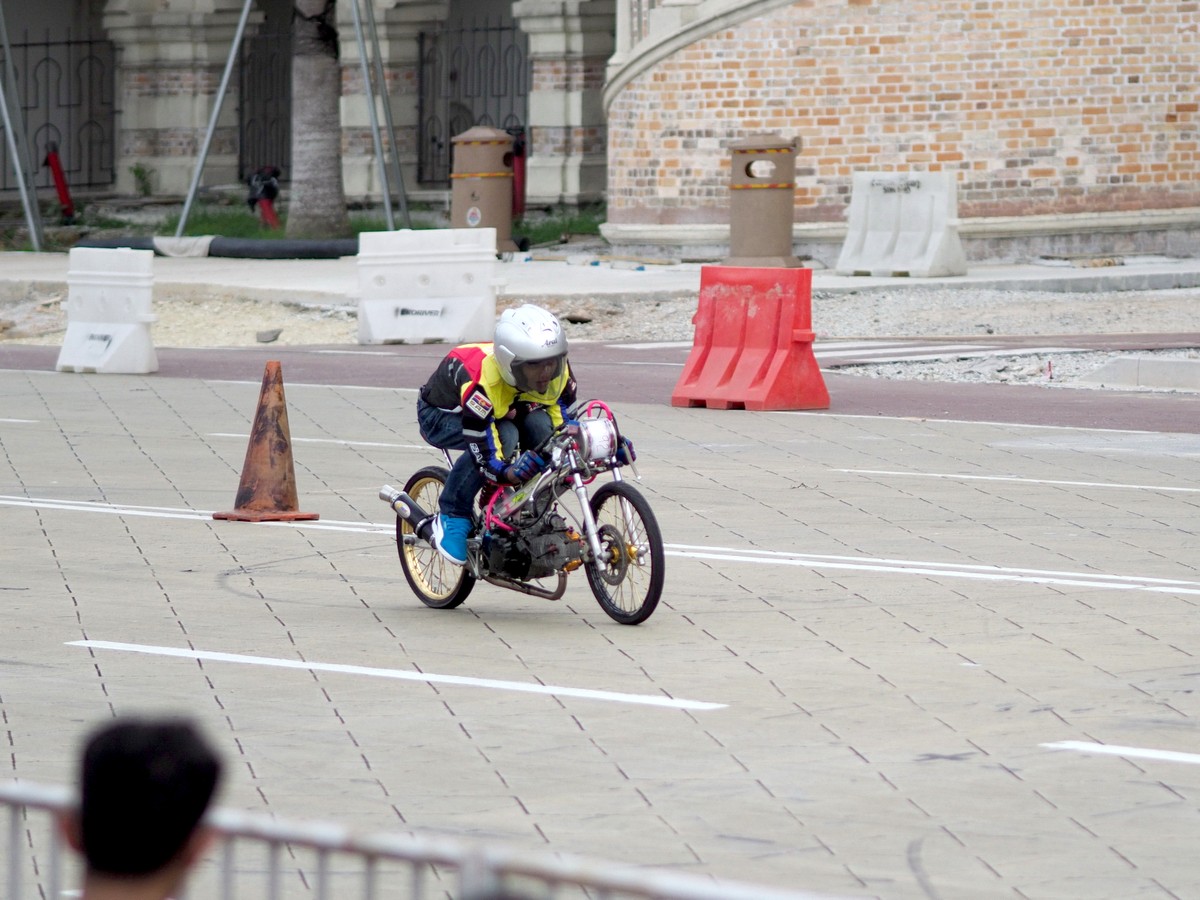
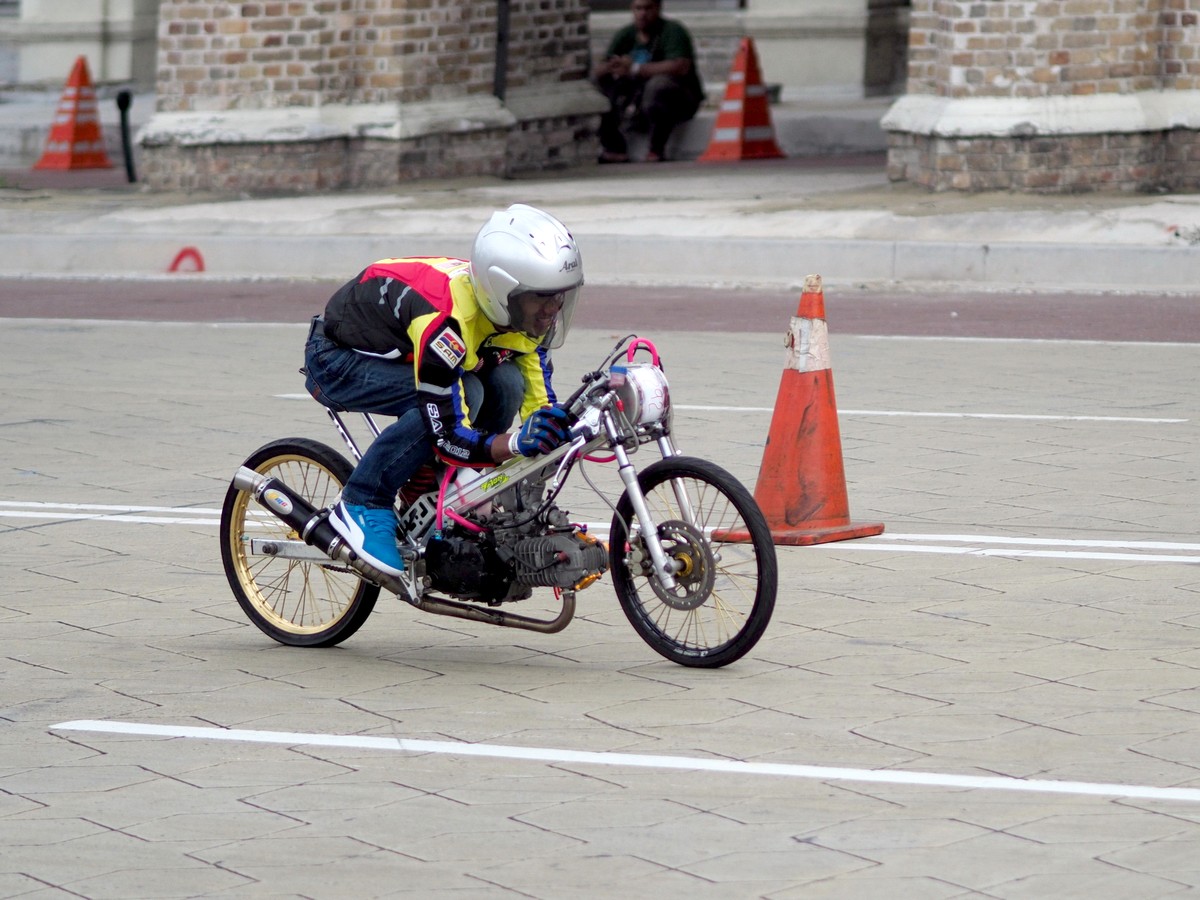
Take a look at the following 2 photographs for the jello effect due to rapid subject movement, taken by electronic shutter. A comparison of E-M1 Mark II's electronic shutter shot vs E-M10 Mark II.

E-M1 Mark II with 75mm F1.8
f/2, 1/16000s, 75mm, ISO800
This was taken at super high speed of 1/16000sec shutter speed, in electronic shutter mode. The flowing water from the fountain was frozen into water droplets, which were almost round in shape.

E-M10 Mark II with 75mm F1.8
f/1.8, 1/16000s, 75mm, ISO800
I replicated the previous shot with my own E-M10 Mark II, which also has an electronic shutter. Since the curtain speed of the E-M10 Mark II was not fast enough, the water was not properly frozen, and the droplets were seen as elongated.

Left: E-M1 Mark II vs Right: E-M10 Mark II
This comparison clearly shows the superiority of the E-M1 Mark II in handling superbly fast moving subjects while minimizing jello/rolling shutter effect.
CONTINUOUS AUTOFOCUS PERFORMANCE
I have covered the improvement of Continuous AF in my original E-M1 Mark II review, and this is just an extension to further elaborate on some points I have left out (mostly technical controls and settings). I must reiterate that I am not a sports and action photographer, and I did not have any experience handling fast moving subjects or shooting in continuous AF mode.
The E-M1 Mark II has the following implementations to ensure high performing continuous AF:
1) Two Quad Core powerful processors to handle all camera operations simultaneously, meaning image processing, AF operations and all camera activities including writing to SD cards can be handled all at the same time, with no compromise or slowing down. The buffer has also been increased twice in size. Therefore, E-M1 Mark II can achieve a full 18 frames per second for Continuous AF sequential shooting in electronic shutter mode, and 10 frames per second with mechanical shutter.
2) 121 phase detect AF points, all full cross to increase sensitivity for tracking of subject movements.
3) While the images are being captured in sequential shooting, the images recorded were also immediately utilized for continuous AF calculations.
In traditional DSLR format, while the image is being shot, the mirror has to be flipped up to allow light to hit the image sensor, blocking the AF module, resulting in temporary pause of AF operations. The AF in the DSLR can only resume as the mirror flips down again, so this intermittent, repetitive interruptions of AF can limit the potential of continuous focusing when shooting in high speed burst sequential mode. In the E-M1 Mark II, the AF happens at real time while live view or EVF is in use, and in sequential high speed burst, the images captured (say 60fps, or 18fps) were all fully used to calculate/predict subject movements, creating a seamless, uninterrupted, full time continuous AF operation.

5) Cluster Target Display
Cluster target display can be enabled to allow continuous tracking of subject movement anywhere across the screen, which can be useful when shooting difficult to predict moving subject. This can be enabled by choosing C-AF, AF Area Pointer set to ON2, and activate ALL focusing points.
6) C-AF Lock
C-AF prediction can be customized for the subject movement. Using C-AF lock, if the subject is moving mostly from front to back (toward or away from camera), for example a kid running towards you, C-AF being set to Loose +1 or +2 can secure higher chance of hit rate. If the subject has high tendency of moving left to right, for example a football/soccer player, then using Tight -2 setting will help the C-AF better. If unsure, like myself in all my tests, I have set the C-AF lock to the default zero position.
While I cannot comment much on continuous AF performance due to my lack of experience, I can say that I have managed to get quite high hit rate based on my few days of shooting with the E-M1 Mark II. I think the camera just works.
7) Focus Limiter
If you know how far you are from your subjects and you know for sure the range within the moving subjects which will be in focus, you can enable the in-camera focus limiter to ensure higher chance of focusing success when tracking the moving subjects.


Here are some more samples I managed to gather over the weekend.
CONTINUOUS-AUTOFOCUS SAMPLES 1
E-M1 Mark II with 75mm F1.8 lens
C-AF at 18fps
shot at F1.8, 1/6400sec to 1/8000sec, ISO200


CONTINUOUS-AUTOFOCUS SAMPLES 2
E-M1 Mark II with 75mm F1.8 lens
C-AF at 18fps
shot at F1.8, 1/1250sec to 1/1600sec, ISO800


FEATURE CHANGES, ADDITIONS & IMPROVEMENTS
Auto ISO in Manual with Exposure Compensation
I have heard of the constant complains, even from my fellow Olympus street photographers who shoot a lot in manual mode, that in the Auto ISO of Olympus cameras, you cannot control the exposure compensation (which would affect the changes in Auto ISO setting). Now, in the E-M1 Mark II, you can adjust the exposure compensation to directly effect the Auto ISO settings, and you can do so by either using the function switch near the viewfinder (previously known as 2x2 switch in E-M1 2013 version) or you can customize one of the many function buttons that you can press to access the exposure compensation directly.

Exposure compensation is now available in Manual Auto ISO mode in the E-M1 Mark II

You can customize one of the function buttons to access the exposure compensation directly.

Alternatively you can use the 2x2 function dial, by switching it to a different position to access the exposure compensation setting.
Minimum Shutter Speed in Auto ISO
When shooting in Program or Aperture Priority mode, previously there was no setting to limit the slowest shutter speed, and sometimes the Olympus OM-D and PEN cameras can choose too slow of a shutter speed that might not be sufficient to mitigate motion blur. This was always the case that works against street photographers who shoot in A or P mode, that in most situations fast shutter speed is required to freeze movements, then suddenly the camera decided to give you a 1/20sec shutter speed. By having the slowest shutter speed limit, say setting it to 1/250sec or faster, it is very safe to capture (slow moving subjects of course) and mitigate motion blur!


You can fully customize how slow the shutter speed needs to be before the ISO changes automatically
Function Switch Near The Shutter Button Can Be Designated as Power Switch
The function switch located next to the thumb grip/hook area can be customized to work as power switch, which will be desirable for many photographers who work the camera single-handedly. The 2x2 function switch can be easily reached by the thumb for powering up or down the camera, instead of using the default power switch which was located at the far left top of the camera, requiring you to use your left hand to operate it.

You can reassign the power switch to the function 2x2 switch near the thumb grip area

The 2x2 function switch is easily reached by your thumb to single handedly turn off and on the camera.
VIDEO RECORDING
I am still a noob when it comes to video recording, and I do not think there is much I can add to the video part of the E-M1 Mark II, and I shall leave this to more qualified cinematographers/video reviewers.
However, I would like to provide one video sample which I have recorded using the Cinema 4K setting (4096 x 2160) at 237Mbs readout rate, with Flat Profile enabled. I have uplaoded this to Youtube, so please be wary that Youtube may apply some funky compression which may introduce unwanted artifacts or quality loss. Nonetheless, the short footage demonstrates the capability of the 5-Axis IS steadying the video while I was walking around with the E-M1 Mark II hand-held at all times, and the transition from indoor to outdoor lighting condition. Unfortunately the sky was not so great (it was about to rain) and we do not get sunny clear skies these days.
OLYMPUS OM-D E-M1 MARK II CINEMA 4K VIDEO SAMPLE (HAND-HELD)
Video was recorded with M.Zuiko 7-14mm PRO lens
MORE SAMPLE IMAGES
I initially wanted to test the Four Thirds DSLR lenses, but there was just not enough time for me to do so, and please understand I have used all my weekend for this particular review extension. I may use the Four Thirds lenses to test in the future, so I apologize to those of you who have been waiting for me to write about this in this entry. I just had too much to do and I could not fit everything with the limited time that I had. I do not intend to postpone this blog entry any further, it has been almost a week since my first original review of the E-M1 Mark II. I thought it would be wise to address some common questions now, and tick off as many items as I can.

75mm lens, f/1.8, 1/320s, ISO1600

75mm lens, f/1.8, 1/400s, ISO2000

75mm lens, f/1.8, 1/4000s, ISO400

12-100mm PRO, f/4, 1/100s, ISO800

12-100mm lens, f/4, 1/30s, 61mm, ISO200

45mm lens, f/1.8, 1/80s, ISO1600

Crop from previous image

75mm lens, f/2.8, 1/20s, 75mm, ISO1600

45mm lens, f/1.8, 1/400s, 45mm, ISO2500

45mm lens, f/4, 1/125s, ISO3200

Crop from previous image

45mm lens, f/1.8, 1/80s, ISO3200

45mm lens, f/1.8, 1/160s, ISO3200

Crop from previous image

45mm lens, f/1.8, 1/160s, ISO3200

Crop from previous image

45mm lens, f/1.8, 1/200s, ISO3200

Crop from previous image

45mm lens. f/2.2, 1/125, ISO2500

45mm lens, f/1.8, 1/60s, ISO3200

45mm lens, f/1.8, 1/80s, ISO6400

Crop from previous image
I strongly suggest that you go to the nearest Olympus E-M1 Mark II touch and try event, I am sure Olympus representative near you will be organizing some awesome event, and having used the camera up close ad personal, I believe you will be able to see for yourself if the camera is suitable for your own shooting needs.
The Olympus OM-D E-M1 Mark II was such a great camera to use. I certainly have enjoyed using it and I will continue to use it as much as I can get my hands on it. Please do keep your questions coming and I will try my best to answer them. I may have not cleared all the questions (from comments, emails and Facebook Page) but please do bear with me a while longer, it has been super crazy busy in office lately.
I will do my best to catch up in my reply to everyone, I promise.
Please support my blog by liking my Facebook Page here (click).
Thus articles Olympus OM-D E-M1 Mark II Review Extension
that is all articles Olympus OM-D E-M1 Mark II Review Extension This time, hopefully can provide benefits to all of you. Okay, see you in another article posting.
You now read the article Olympus OM-D E-M1 Mark II Review Extension with the link address https://huaweiluau22.blogspot.com/2016/11/olympus-om-d-e-m1-mark-ii-review.html
0 Response to "Olympus OM-D E-M1 Mark II Review Extension"
Post a Comment